Do you seek to turn your ordinary bicycle into a real powerhouse with an electric motor? The friction drive e-bike conversion kit is one of the most straightforward and cost-effective ways to enter the world of e-biking. As was already mentioned, they are usually some of the most minimalistic options available on the market. In this guide, you will receive all-encompassing recommendations, starting with technology and the top picks and ending with the crucial considerations. You will learn five main aspects to check to ensure you choose a perfect kit and experience a great transformation in all senses of this word.
Understanding Technology: Pros, Cons, and Best Use Cases
For a start, it is vital to understand how a good, high-quality system should work. Unlike mid- and hub-drives, a friction drive employs a powered roller, which presses the tire from the top, providing the friction required to rotate the wheel. The simplicity aspect is the most appealing but also the most limiting one. To comprehend whether it will suit your riding style and terrain, consider these aspects:
Key Pros of Friction
- Simplicity of installation: The research reveals that the installation will take less than an hour even with basic instruments. Unlike all other technologies, friction drives need no alterations to be integrated.
- Weight: The conversion effect tends to be minor, and your driving style and controlling efforts are unlikely to increase, unlike what happens with hub drives.
- Price: It is the most affordable option to add a motor to the bike available.
- Universality: They are likely to fit most bikes of all shapes and designs, including those with unusual dropouts and axles.
Significant Disadvantages to Consider
- Performance in Wet Conditions: Water between the roller and tire reduces friction greatly, causing slippage and a near-total power loss.
- Tire Wear: The roller will be constantly pressing down hard and rolling on your rear tire, significantly reducing its lifespan. High-quality, durable tires are essential.
- Efficiency: Friction drives are generally less efficient than other systems, and a battery of the same size will provide less range.
- Noise: Some systems can be far louder than the near-silent operation of hub or mid-drive motors.
Best Use Cases for a Friction Drive Kit
- Commuters in a dry, urban, and relatively flat environment.
- Riders seeking a budget-friendly and easily reversible way of turning any bike into an electric model.
- Cyclists in need of a light, temporary boost that is easily detachable and attachable.
Despite their Simplicity, A Dedicated Mid-Drive Is Simply a Better Performer

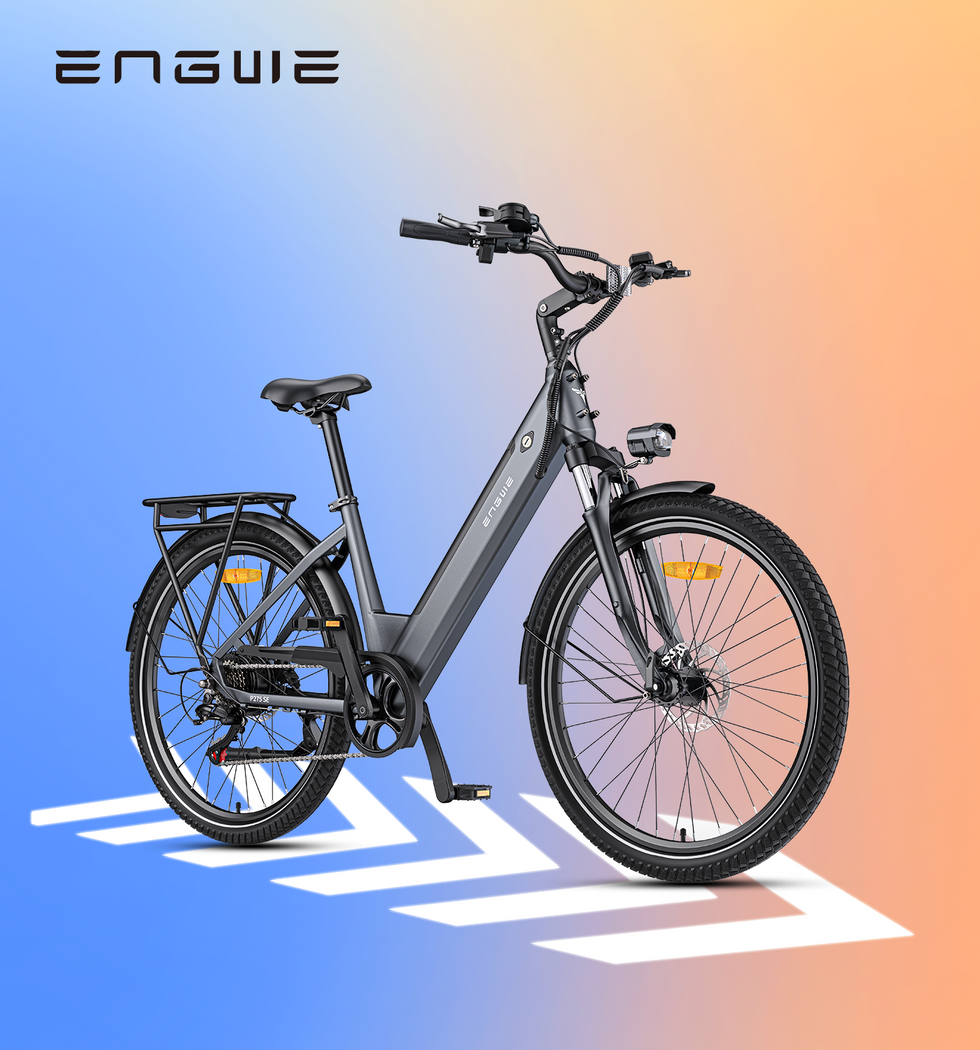
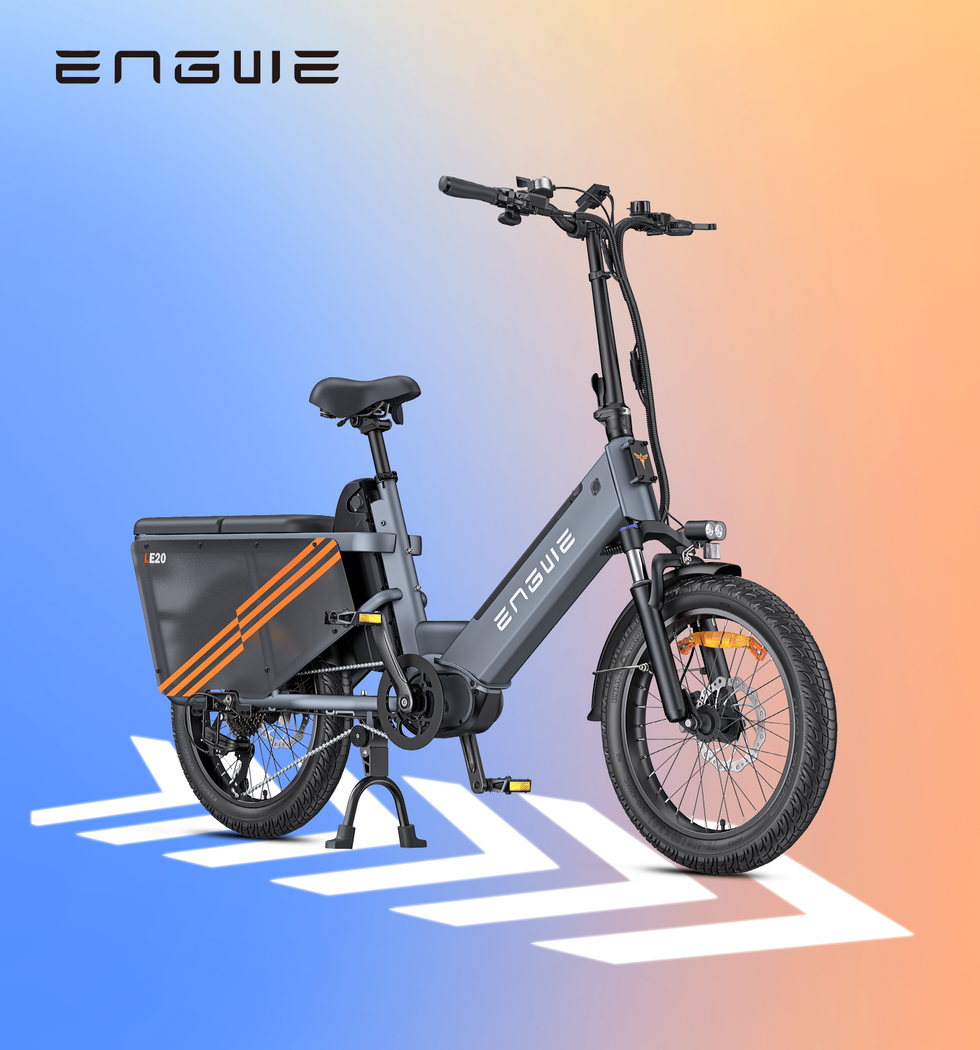
Friction drive offers a simple entry point for any DIY enthusiast, but for the best climbing and riding experience, the best choice is a purpose-built e-bike with a mid-drive motor. Mid-drive motors are installed at the bike’s crankset, directly transmitting power to the drivetrain. This allows the motor to use the bike’s gears, providing it with significant climbing abilities, higher efficiency, and a far more natural riding feel. A perfect example is the ENGWE L20 3.0 Pro, which boldly demonstrates why a designed e-bike is always a better long-term investment.
- Unmatched power and torque: Our L20 3.0 Pro is powered by a high-performance 250W Mivice mid-drive motor that generates an incredible 100Nm of torque. Our unmatched power gives you unique speed capabilities and allows you to climb such steep hills that most powerful conversion kits would struggle with.
- Exceptional range and fast charging: With a gigantic 720Wh Samsung battery, the L20 3.0 Pro gives an exceptional riding experience of up to 160km on a single charge. Once the battery is empty, 8A support allows quick recharging of empty cells.
- Supreme comfort and control: As the first compact full-suspension e-bike, the L20 3.0 Pro erases up to 90% of driving-originating shocks and vibrations. Our hydraulic dual-piston brakes and wide 3.0-inch anti-puncture tires make for a very relaxing and safe ride in the city, no questions asked.
- Advanced smart features: With the IoT module, the L20 3.0 Pro features anti-theft capabilities, ensuring the peace and safety of your bike and your mind. The foldable step-through frame makes storing our bike a breeze.


Top Recommendations and Key Features of Leading Friction Drive Kits
Now that you understand the technology and its alternatives, you are prepared to see some high-quality, friction-drive kits. The following units range from high-priced, high-quality, consumer-friendly products to cheap, basic DIY options. Your choice should depend on your budget and technical savviness. Keep it in mind while asking yourself: what would I do, and what would I like to have done for me?
Rubbee X (premium all-in-one)
A completely wireless, self-contained unit with the motor, the battery, and the controller included in one easy-to-mount package.
- Key feature: Takes just seconds to attach to the seat post. The wireless cadence sensor on the crank arm senses pedaling and powers up the motor.
- Smart technology: With regenerative braking that recharges the battery on descents, this type can be configured via a smartphone app.
- Best for: Those who put ease of use, the ability to carry and switch between bikes, and modern technology first.
Bimotal Elevate (high-performance rim drive)
Installed on the disc brake caliper mounts and drives the brake rotor itself, which allows a firm grip unaffected by tire or weather conditions.
- Key feature: A unique design with high power and torque that can satisfy more performance-oriented usage like mountain biking.
- Performance: Requires a more complex attachment process than a standard friction drive but bonds much more firmly and reliably.
- Best for: Performance-oriented users, especially for mountain bikers, interested in removable systems that forego the traditional limitations of friction drives.
Generic DIY Kits (budget-friendly)
Generally component kits found on platforms like Amazon or eBay. Include a motor, mounting bracket, a controller, and a throttle.
- Key feature: Requires a custom battery, which increases the flexibility of these kits but adds an extra level of complexity.
- Cost-saving: Favor kits with a motor from MY1016 or other renowned brands and a suitable controller and Li-ion batteries if your know-how allows.
- Best for: Budget-conscious makers and enthusiasts comfortable with such assembly and a more trial-and-error process.
Rubbee X vs. Bimotal Elevate vs. Generic DIY Kit: Comparison Table
| Feature | Rubbee X | Bimotal Elevate | Generic DIY Kit |
|---|---|---|---|
| Drive Method | Tire surface | Brake rotor (rim) | Tire surface |
| Installation | Very easy – seconds | Moderate | Difficult – requires wiring |
| Wet Performance | Poor | Excellent | Poor |
| Portability | Excellent | Very good | Poor – fixed |
| Ideal User | Urban commuter | Performance/MTB rider | Budget DIY enthusiast |
Critical Factors to Consider When Choosing Your Kit
There is more to selecting a friction drive kit than choosing a brand and model. You must also assess the set’s technical characteristics to ensure they firmly fit your bicycle and accomplish the performance you desire. Skipping such significant details may result in a frustrating experience, poor performance, or even bike damage. Choose your kit wisely by focusing on the following decisive factors:
Motor Specifications
- Power (Watts): Street-legal limits in many countries are typically 250W. Kits with more muscle – i.e., over 500W – are usually for off-road use.
- Voltage (V): The most common kits’ voltage is either 24V, 36V, or 48V. A higher voltage may generally mean additional capability, such as efficiency and top speed. Make sure that your battery’s voltage aligns with your motor and controller.
Battery and Controller Compatibility
- Battery Chemistry: Lithium-ion. You should always pick a high-quality Li-ion battery. This approach offers a balance of weight, capacity, and lifespan.
- Capacity (Ah/Wh): The measurements in Ah or Wh reflect your range. A higher number means a longer range. Determine your commute’s length and choose accordingly.
- Controller: The controller must be matched to your motor and battery—it's rated to handle the amperage from the battery within safe limits. A mismatch can burn out components.
Physical Compatibility with Your Bicycle
- Tire Type and Size: Friction drives perform best on smooth, slick, or semi-slick tires; knobby mountain bike tires offer poor contact and quickly wear down. Additionally, ensure the kit’s roller fits your tire width.
- Frame Geometry: Check for clearance around the seat tube and rear wheel where the equipment mounts. Some frames, such as full-suspension models or small-size bikes, do not have sufficient room or cannot accommodate securing hardware.
- Brake Type: Most friction drives are mounted near the rear wheel so that they are suitable with rim and disc brakes. However, always double-check that the mounting bracket is compatible with your bike’s design.

Key Installation, Maintenance, and Performance Optimization Tips
Once you have chosen the proper kit, proper installation and maintenance guarantee its longevity and optimal performance. Improperly installed kits are inefficient, noisy, and hazardous. By following several best practices, you may safeguard your investment and keep your electric bike in great shape for many years.
Key Installation Steps and Techniques
- Secure Mounting: The motor bracket must be securely fastened to the bike frame. Due to vibration, apply thread-locking adhesive to the bolts to prevent them from loosening over time.
- Roller Pressure Adjustment: This is the most important consideration when securing the roller to the tire. The roller should be clamped down just enough to get traction without causing excessive drag. An effective method: The tire should be compressed by about 1/4 inch. Experiment with different pressure levels to discover what works best for you. Excessive pressure wastes energy and causes the tire to wear down excessively quickly; too little pressure causes the roller to slip.
- Clean Wiring: Lay all electrical wires neatly and secure them with cable ties. Avoid sharp angles and make sure the wires don’t bend in a way that they get in the way of the pedals or get caught in the chain.
Essential Maintenance Checklist
- Tire Pressure: Always keep the tire at the maximum recommended pressure. A soft tire will produce more rolling resistance and may slip at higher powers.
- Clean Contact Surfaces: Regularly wipe down the motor roller and the contact patch on your tire to keep surfaces clean. A simple cloth can catch dirt from both rubber surfaces.
- Inspect Tires for Wear: Check if the patch where the roller contacts the tire has worn out. Rotate the tire if necessary or replace it.
- Check Connections: Check all electrical connectors at regular intervals to ensure they are connected and free from corrosion.
Tips to Maximize Performance and Range
- Assist, Don’t Rely: Use the motor to assist your cycling and not as the primary source of power. This simple measure can dramatically increase the battery range.
- Choose Smooth Tires: Hybrid or commuter tires without aggressive tread are excellent for the rear tire. A rear mountain bike tire is slippery and inefficient.
Frequently Asked Questions
Q1: Can I run a friction drive kit in the rain?
A: No, the system performs poorly when wet. High-end kits that have a special roller material might be better. Most kits are not to be used in wet conditions.
Q2: Will a friction drive kit destroy my rear tire?
A: Your back tire will wear out faster than with normal use. Getting more durable tires, keeping optimal pressure, and ensuring proper roller alignment may reduce wear rates.
Q3: Are friction drive e-bikes legal?
A: Their use is subject to local regulations. Most regions have a maximum allowed power output, such as 250 watts for the EU and 750 watts in most US states.
By considering these aspects, you can choose the best alternative to transform your ride.