However, even the most fulfilling parts of making your own fat tire electric bike should entail a carefully considered budget. Let’s divide the realistic expenses on building your dream ride into five quintessential dimensions, ranging from core components to wrapping up the account for a completely DIY or professionally engineered solution. Read on to learn where you can cut corners, which parts are worth their price tag, and how to plan your build to avoid any last-minute financial surprises. Let’s break down the budget that will work best for you.
Core Conversion Kit
The choices you make in assembling the three components of the core conversion kit—motor, battery, and controller—represent the single largest chunk of your build budget. At the same time, they will also determine the vehicle’s performance and potential. The budget you settle for would depend on these defining features. Saving money on any of these paramount elements will require you to compromise either power or range, depending on your ethos and use. For a fat tire build, you cannot skimp on the battery, especially in the context of pricing. A quality battery is a pricey purchase – but isn’t one to save on, as its quality and safety will impact not only the bike’s performance but personal safety as well.
Motor:
Your primary options are a hub motor and a mid-drive motor.
- Hub Motors: Hub motors are generally cheap and easy to fit to your bike, residing in the front or rear wheel hub. Geared hub motors are light and provide good torque for hill climbs, while direct-drive hub motors are more straightforward and usually have regenerative braking but also weigh more.
- Mid-Drive Motors: These are more costly and complicated-to-fit kits with fantastic performance, especially on hills, as they use your bike’s gears to provide a more natural feel to riding when installing a kit.
Battery:
The most costly part of your e-bike. Volts dictate the budget spent on power, and amp-hours determine the cost of your e-bike’s battery.
- Saving tip: Don’t cut corners by paying for a cheap battery. They can be too dangerous to run on your bike. Instead, buy from reputable sources that offer last year’s equivalents, or shorter distance batteries work if you are not cycling far to work. For the best value and performance, the most common battery size is 48 volts of 13 amp-hours.
Controller:
The brains of an electric bike manage power from the battery to the motor. Most kits come with a controller to match the motor, but if you buy the two separately, make sure the voltage and amperage are suitable for each other.
The Chassis
Before you electrify, you need a good bicycle to electrify. This “donor bike” and the rest of the infrastructure are essential to safety and the ride. Because of the motor’s weight and speeds, it is critical. The output level is determined by your budget: fat tire e-bike frames and brakes may be used. The donor bike’s balance and its ability for cornering are two key points it must meet. The frame's backbone should be centered to prevent vibration. This avoids instability, which may lead to severe safety hazards and harm. In both the e-bike and other gadgets, friction management is important. Thus, the friction strength on the surface is always an important aspect of the bike’s excellence. In other words, improving the frame is not only to improve the ride quality, but it is an extremely crucial safety investment.
Donor Bicycle
The best tip is to obtain an old used mountain bike with a steel or aluminum frame. These are high-quality, solid, and usually have mounts for disc brakes. Check classifieds, bike shops, and garage sales for a quality used frame. Make sure there is space in the main triangle near the seat tube to mount a battery. Money-saving tip: Your donor fat tire e-bike may not have fat tires.
Brakes
For a heavy, fast bike, standard rim brakes are inadequate. Mechanical disc brakes are a significant upgrade and a minimum safety requirement. They offer good stopping power and consistent wet-weather performance for fat tire e-bikes. Hydraulic disc brakes are the best. Hydraulic brakes provide much more stopping power and modulation with less hand effort to prevent wrist fatigue on the steepest descents. This is a required upgrade if your donor bike comes with mechanical disc brakes.
Fat tires and wheels
This means that fat tires can be a necessity. Use 4.0-inch tires. The wheels must be strong enough to support your vehicle and the power of a motor. You will also need heavy-duty spokes and, if you are not lacing them yourself, professional help.
The Interface
This covers the components you interact with on every ride. They determine how you control the bike’s power and monitor its performance. Although you can put together a very basic system, investing a bit more in these interface components can make a huge difference in your riding experience, making it more intuitive, comfortable, and efficient. Furthermore, high-quality components in this area also make it look like a far more professional and polished final build, moving it from a DIY project to your own vehicle.
Display:
- Basic LED Display: Simply displays the battery level and assist level. It is a very basic, thrifty option.
- LCD Display: An upgrade well worth the extra money; it offers much more crucial information: speed, trip distance, odometer, wattage, and the total time the motor has run, allowing you to keep track of your ride in detail.
Throttle and Pedal Assist Sensor:
- Throttle: A thumb or twist throttle allows you to add power without pedaling. It is great for starting from a stop.
- Cadence Sensor (PAS): This is the standard for most kits of this type; the motor kicks on immediately when you start pedaling.
- Torque Sensor (PAS): This is a very premium option, and only a few mid-drive kits offer it; it measures how hard you push and delivers power in proportion. This results in a very smooth, natural feel to the ride: it is almost as if you grew bionic legs.
Drivetrain Components:
The additional power from a motor, especially that of a mid-drive, will put much more stress on your chain, cassette, and derailleur. You may need to upgrade to a stronger chain made for e-bikes. Ensure your derailleur is set up properly to handle the torque and prevent your gear from skipping under load.
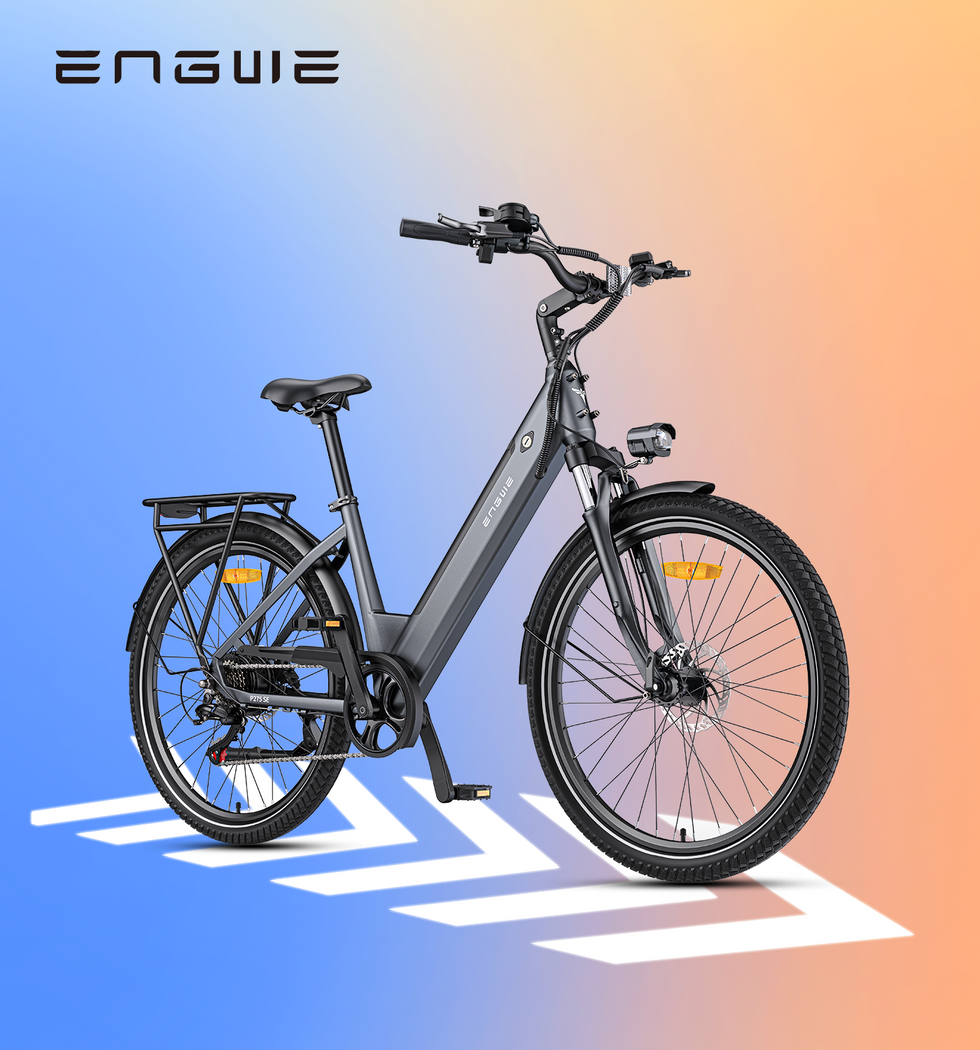
Pre-Built Alternative

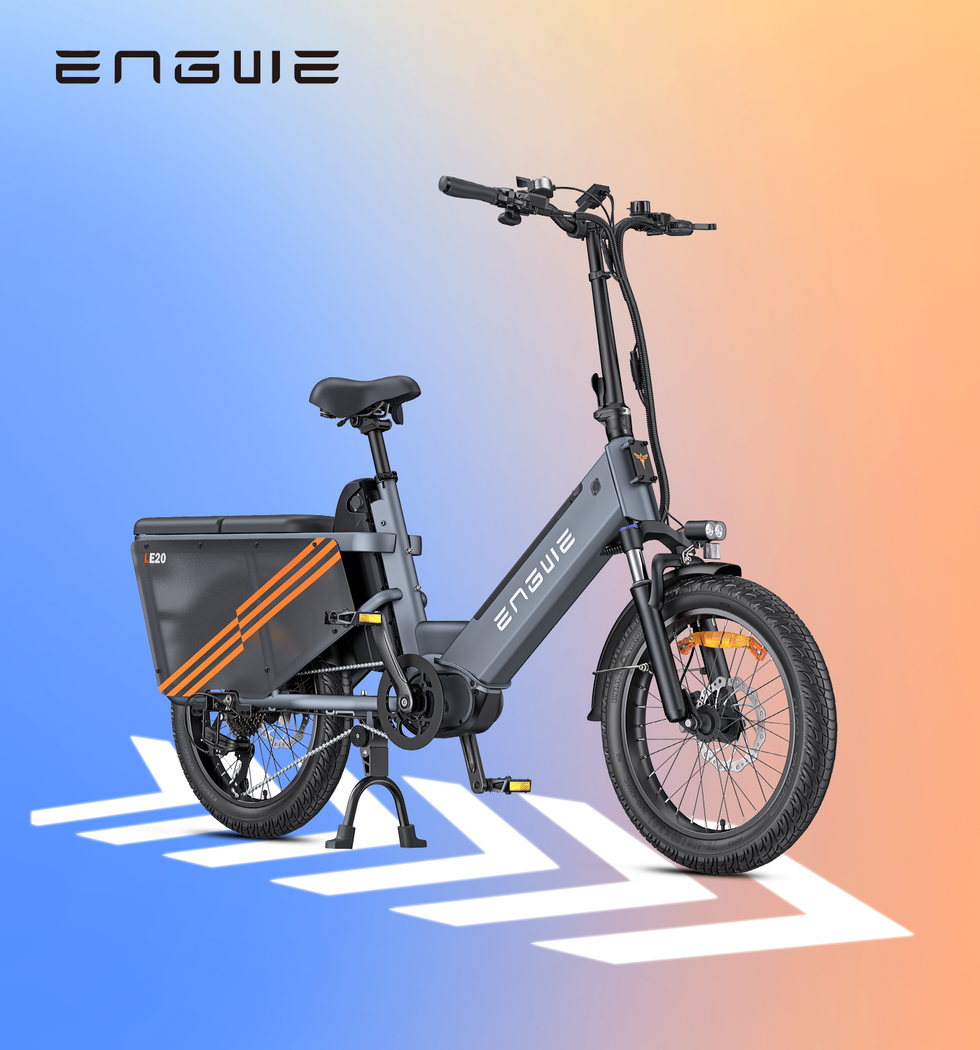
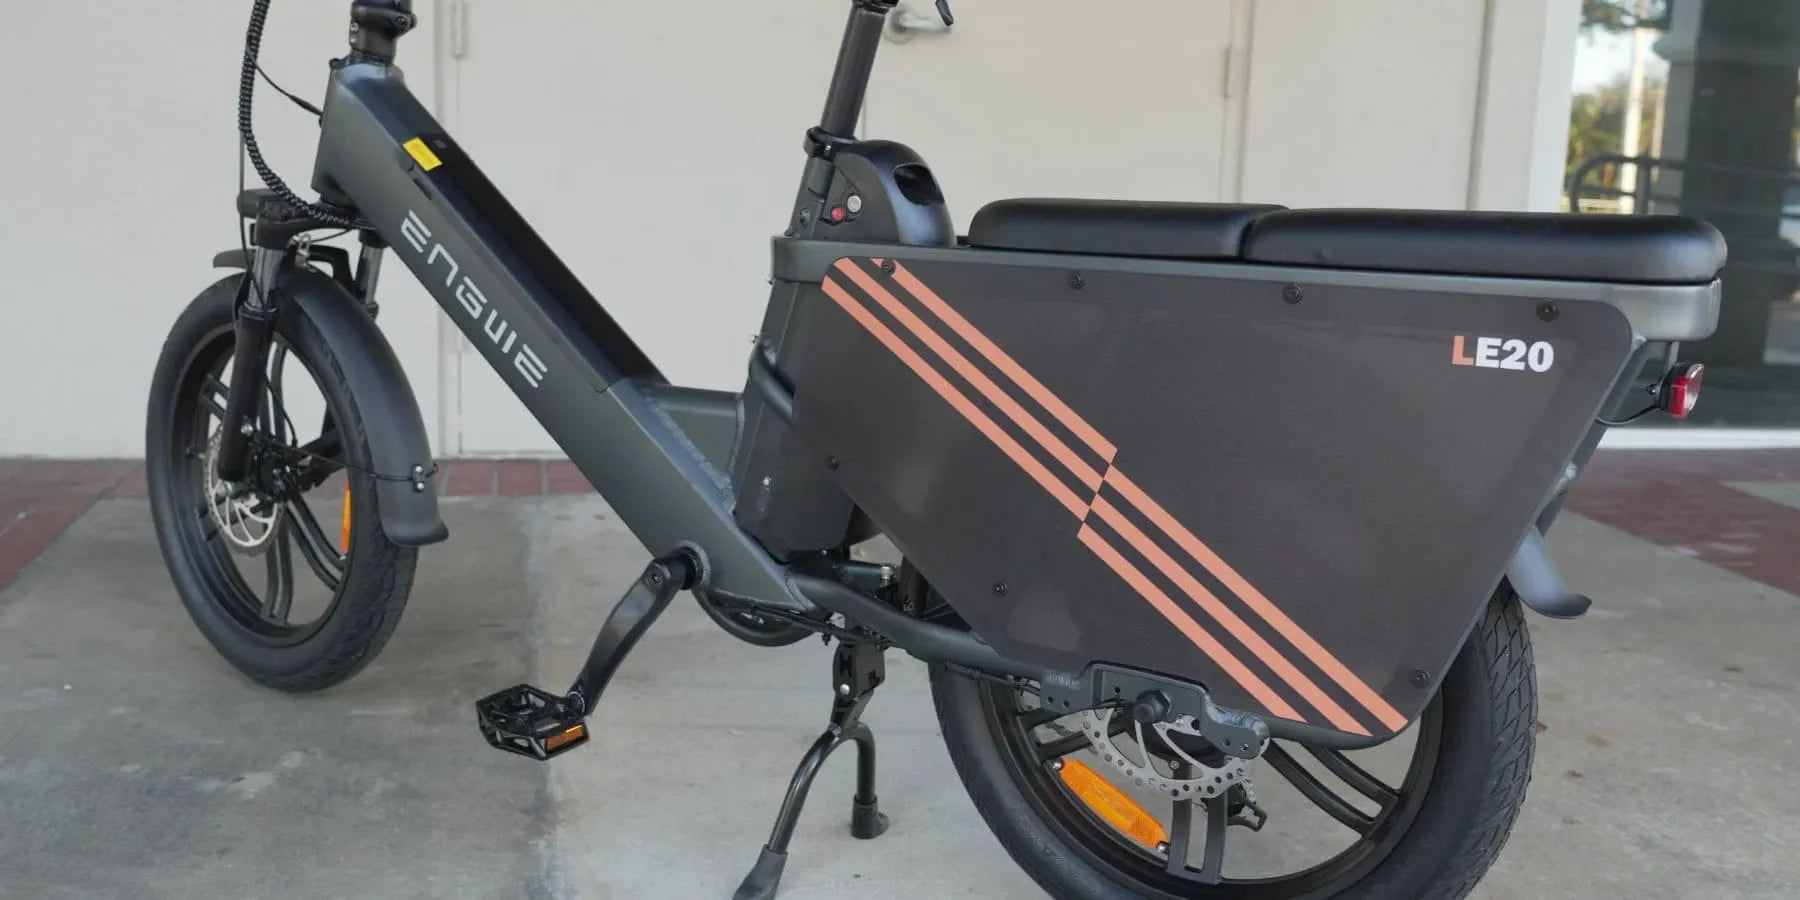
While the DIY build provides a more fulfilling experience, its value is not necessarily sufficient to counter the opportunity cost of time, complexity, and mistakes related to assembly. For many people, the perfect compromise lies in a fully equipped, professionally engineered electric bike, prepared by a reputable brand. Leading manufacturers, such as ENGWE, offer their customers unparalleled craftsmanship and a hassle-free, enjoyable “out of the box” experience, ultimately saving time and effort, if not money, in the long run. An example of an exceptional final product, such as the manufacturer's dedicated EP-2 Boost, significantly reduces the total amount of guesswork and hassle associated with the DIY project. Integrated performance, combining the torque sensor and ultrasonic kit, results in an unprecedentedly smooth and responsive power assist, considered premium and virtually unachievable in affordable DIY designs. Moreover, its unique Boost Mode instantly uplifts the torque output to 55Nm from 250W, allowing users to easily tackle hills that would otherwise be extremely difficult for a DIY build. Additionally, this solution’s 20” x 4.0” wide all-terrain tires, mounted on one-piece wheels, totally eliminate the DIY struggle of buying spokes and individual components and maintaining the entire process personally. It also includes a 120km battery, 180mm mechanical disc brakes, and a water-resistant frame that rapidly folds for storage and transport. Most importantly, the solution removes the most rigorous leg of the DIY challenge – professionally-assembled bikes do not require extra troubleshooting or individual part acquisition, and come with a warranty that protects users against potential defects.

The Bottom Line
The bottom line is, then, what’s a realistic budget? Here are the three main tiers when you factor in the cost of any specialized tools you may need to buy separately. Your total investment will then be the sum of all these components, any labor costs if you have to pay other people to work on your build, and a small slush fund for unforeseen expenses. Remember that shipping on big items like frames and batteries can mean a big bump in the final price. The following additional dimension takes all the previous points and allows you to see them through a financial lens. In that way, you can quickly determine whether or not the ambition for your project is aligned with what is feasible for you to spend on it.

Entry-level Budget: “The Thrifty Builder”
This price point involves the least number of features in exchange for functionality. You may purchase a second-hand fat bike as your donor, a bare-bones geared rear hub motor kit, a smaller battery from a reliable company, and basic mechanical disc brakes. You’ll be equipped with a simple LED display and a cadence PAS. This is the most budget option to get a running fat tire e-bike.
Mid-range Budget: “The Balanced Performer”
The epitome of a balanced and competitive build that embodies a good fat tire electric bike. A new or very high-end used donor bike, a new more powerful hub motor or a budget mid-drive kit, and a large 48V battery pack for extended mileage. An LCD screen, hydraulic disc brakes, and probably a better-quality drivetrain are some possible upgrades.
High-performance Budget: “The Premium Adventurer”
And lastly, the ultimate budget, for a top-end DIY build that is competitive with the expensive pre-built bikes. A luxury donor full-suspension bike, a top-brand powerful mid-drive motor, a high-capacity battery, and high-end quad-piston hydraulic disc brakes. It’s a must to have a torque PAS at this tier.
| Budget Tier | Focus | Key Components |
|---|---|---|
| Entry-Level | Core functionality and basic transport | Geared Rear Hub Motor, Mechanical Disc Brakes |
| Mid-Range | Balance of performance, range, and safety | Powerful Hub or Entry Mid-Drive, Hydraulic Disc 2-Piston |
| High-Performance | Maximum power, intuitive control, and all-terrain capability | High-Torque Mid-Drive Motor, Hydraulic Disc 4-Piston |
What is the single most expensive component in a DIY e-bike build?
The battery is almost always the most expensive single part involved. A high-quality, safe, and long-range battery pack can easily account for one-third to one-half of the entire project’s budget.
Is it safe to use a very cheap unbranded battery to save money?
Absolutely not. Cheap unbranded batteries are a massive safety hazard – they may ignite, have poor performance, exaggerated capacity claims, and a very short lifespan, making them a poor investment.
Is a DIY build always cheaper than buying a pre-built e-bike?
Not by a long shot. After you factor in the cost of tools, shipping, extra parts, your personal time, and the likelihood of a costly error, a well-priced ready-to-ride e-bike from a reputable brand like ENGWE can offer superior value and peace of mind.
Ultimately, well-planned budgeting is key to getting your dream fat tire e-bike.